Updated in September 2026 for Raspberry Pi OS 13 (Trixie). The measurements in this article were taken in 2021, on the Raspberry Pi OS of that time, and they are unchanged. What has changed is the setup and the test code: the official Coral installation steps no longer work on current Raspberry Pi OS, so both have been updated, and the code in this article now matches the repository.
Google Coral USB accelerator is a device that can be attached to a computer for speeding up inferencing process in Machine Learning projects. It acts as a coprocessor and provides hardware acceleration for Neural Networks. It makes Inferencing process 10 times faster.
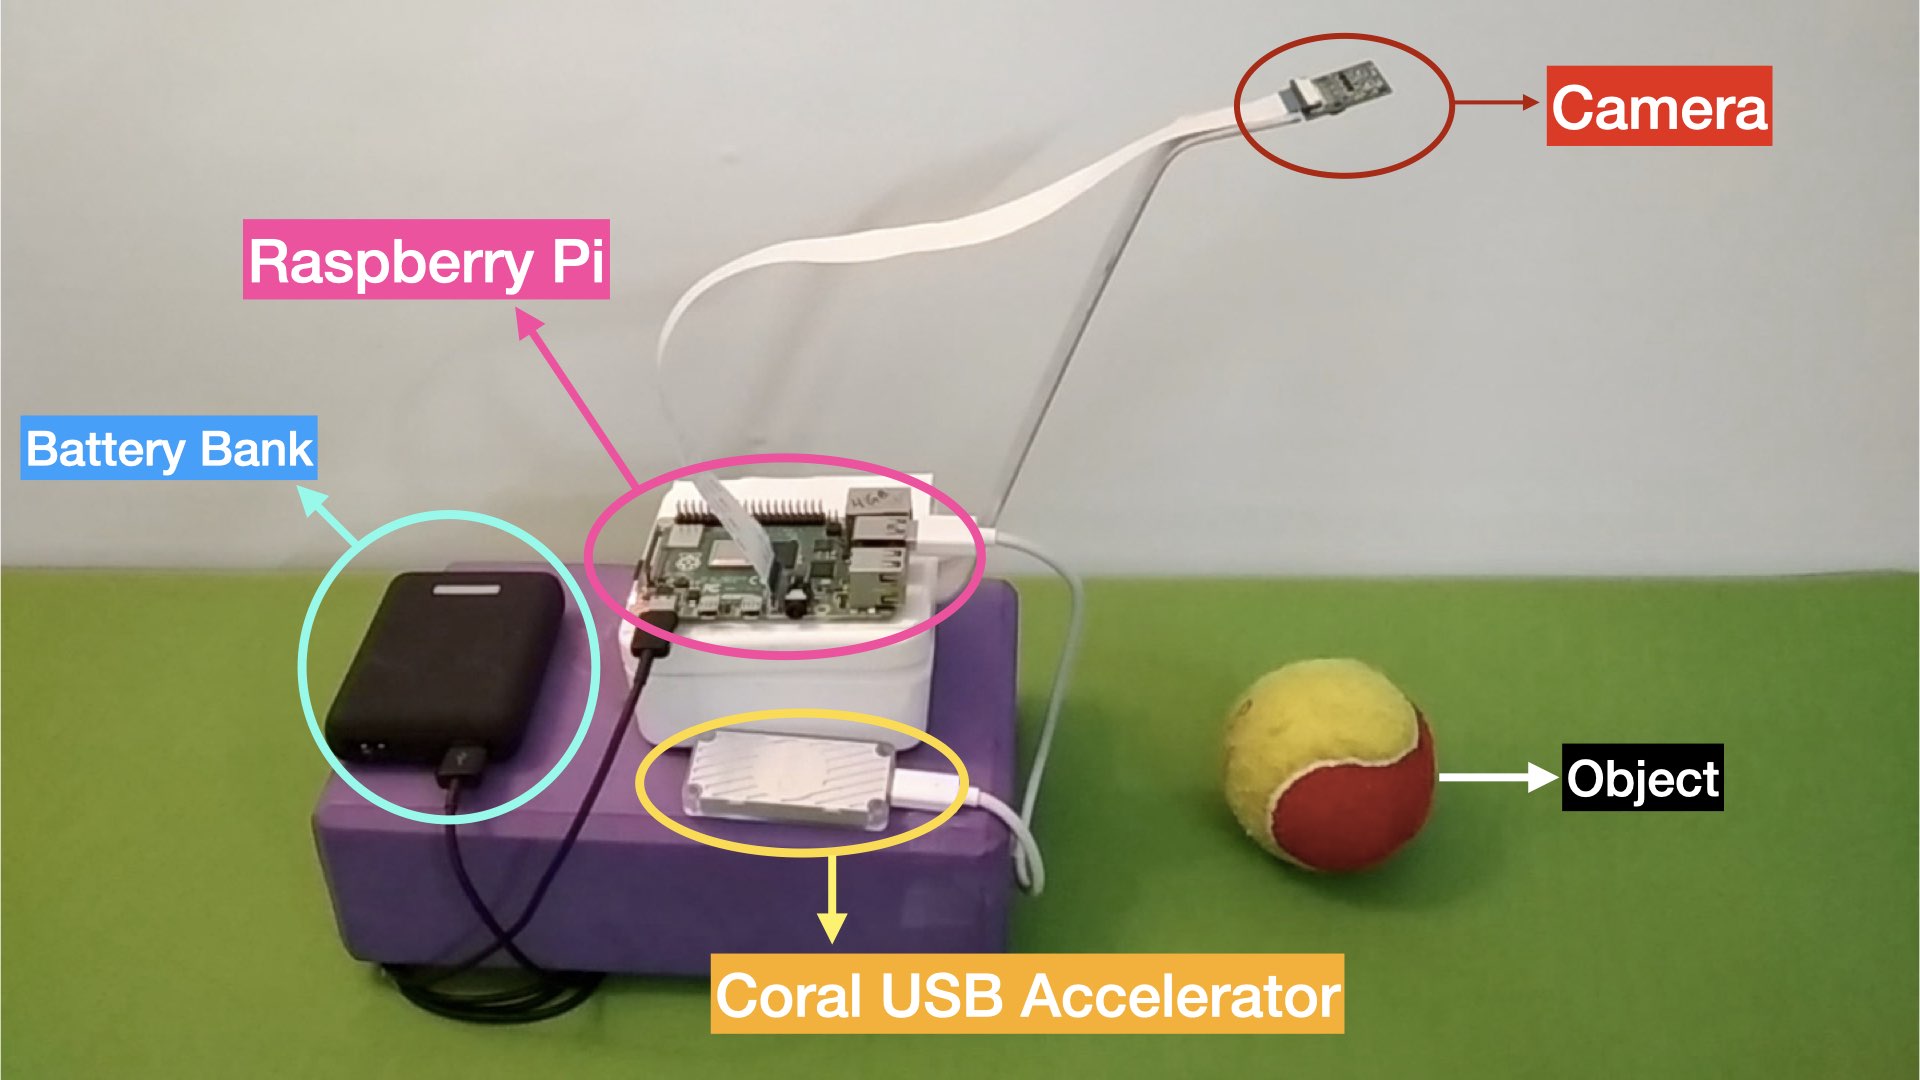
This experiment is about measuring the performance of 4 models (Pi 4 4GB & 8GB , Pi 3B, Pi 3A+) of Raspberry Pi. The performance is measured with and without Coral USB accelerator. Same set of Python scripts (Test Code) are used to perform image classification using a Machine Learning Model (MobileNet V1) on all the models. This is achieved by switching the same micro SD card between the different variants. The setup is shown in the picture below.
Installing the Coral dependencies (2026)
Before we can plug the Coral USB Accelerator into a Raspberry Pi, two pieces of software have to be in place: a TensorFlow Lite runtime for Python, and the Edge TPU library that the accelerator itself needs.
The quickest route is the installer in this article’s GitHub repository. On a Raspberry Pi running the 64-bit Raspberry Pi OS 12 or 13, it does everything described below and fetches the test code into ~/coral_USB_ml_accelerator:
curl -fsSL https://raw.githubusercontent.com/jiteshsaini/coral_USB_ml_accelerator/master/setup_coral.sh -o setup_coral.sh
sudo bash setup_coral.sh
The rest of this section explains what it does and why, for anyone who would rather install by hand.
For years the answer was to follow the official instructions at coral.ai, and that is what this article used to recommend. Those steps no longer work on current Raspberry Pi OS. Google archived the Coral repositories in April 2026, and the libedgetpu library it published was built in 2021 against TensorFlow Lite 2.5. With a present-day runtime that library still loads and the accelerator starts up, but the program then crashes with a segfault the moment an interpreter is created. It is a version mismatch, not a faulty accelerator.
How can we tell the accelerator itself is fine? The Coral changes its name on the USB bus once it has been set up. When you first plug it in, it introduces itself as a Global Unichip device, with the ID 1a6e:089a. When the Coral library starts it, it loads the accelerator’s firmware onto it, and the Coral then reappears as a Google device, 18d1:9302. With the old library that switch still happened, so the accelerator had done its part; the crash came afterwards, from the library and the runtime not matching. You can watch for this switch yourself. The lsusb command at the end of this section shows which of the two IDs your Coral has.
What works is a community rebuild of the same library, maintained at feranick/libedgetpu and compiled against a current TensorFlow. On 64-bit Raspberry Pi OS 13 (Trixie) there are three steps.
1. Install the Python runtime. The tflite_runtime package used by the 2021 scripts is no longer maintained; ai-edge-litert replaces it.
pip3 install --break-system-packages ai-edge-litert==2.2.0
2. Install the matching Edge TPU library. The two versions are a pair. A mismatch does not give you an error message. It crashes when a model is loaded, which is a much harder thing to diagnose.
deb=libedgetpu1-std_16.0tf2.19.1-1.trixie_arm64.deb
curl -fsSL -O https://github.com/feranick/libedgetpu/releases/download/16.0TF2.19.1-1/$deb

# the package still declares libgcc1, a Debian 10 name that libgcc-s1 replaced
sudo dpkg -i --ignore-depends=libgcc1 $deb

# dpkg exits non-zero on that override, so run ldconfig as a separate command.
# Chained with && it would be skipped without a word.
sudo ldconfig
3. Take permission of the device, then replug it. The package installs a udev rule that hands the Coral to the plugdev group, but a rule only applies to devices plugged in after it exists. An accelerator that was already attached stays owned by root, and every program that is not root fails to load the delegate until it is unplugged and plugged back in.
sudo usermod -aG plugdev $USER
# a web application runs as www-data and needs the same:
# sudo usermod -aG plugdev www-data

lsusb | grep -i "google\|global unichip"
That last command is the first check worth making whenever something is wrong. 1a6e:089a (Global Unichip) means the accelerator is attached but has not been initialised yet; 18d1:9302 (Google) means the firmware is loaded and it is ready to work.
Two of my other projects set up the Coral in the same way, as part of their own installers: Model Garden, which runs 24 models on one board with and without the accelerator, and robotics-level-4, the robot’s on-board machine learning.
Testing Coral USB Accelerator
The test scripts used in this experiment are in the coral_USB_ml_accelerator repository on GitHub, in its exp folder; the installer above puts them on your Pi.
Updated in September 2026: the scripts now run on current Raspberry Pi OS. Inference uses ai-edge-litert in place of tflite_runtime, and the camera is read through a small helper, camera.py, which opens either a USB webcam or the Raspberry Pi camera module. The preview window is still drawn with Matplotlib, and appears when the script runs on the Pi’s desktop; over SSH the scripts print the same timings without it. The method, and the output, are the same as in 2021. Running python3 camera.py on its own checks the camera before any model is involved.
There are two test scripts, the camera helper, two model files and a label file in the folder. The two test scripts are:-
=> classify.py : It works with model file ‘mobilenet_v1_1.0_224_quant.tflite’ and does not make use of the Coral USB accelerator.
=> classify_coral.py: It works with model file ‘mobilenet_v1_1.0_224_quant_edgetpu.tflite’ and makes use of the Coral USB accelerator. This file is identical to ‘classify.py’ except the minor modifications which are incorporated to make it work with Coral USB accelerator. The modifications are as follows:-
1. Import load_delegate from ai_edge_litert.interpreter
2. Change the path of model file and make it point to the ‘edgetpu’ model file
3. Make interpreter with ‘load_delegate’ function.
The details are covered in the Code Walkthrough section. The basic tasks performed by both the scripts are as shown below.
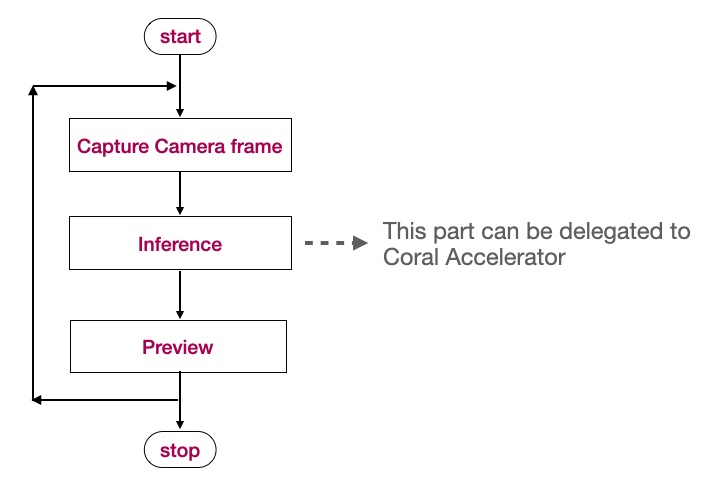
‘Camera capture’ and ‘Preview’ involves getting a picture frame from the camera and displaying it on a output window with suitable annotations. There are multiple methods to do these tasks efficiently and minimise the processing time. One such method is to perform the camera related task through OpenCV.
‘Inference’ involves obtaining predictions from the model file based on the input image. The time taken in this step depends upon the model file being used. Inference time may vary from model to model depending upon how many classes it has. Without any external hardware acceleration, this task is performed by the CPU and devours the precious processor resources. In order to build applications that employ a machine learning model for a real-time use case, it is imperative that the inferencing time must be as low as possible to get maximum FPS.
The Python script ‘classify_coral.py’ delegates the inferencing part to the Coral USB Accelerator and brings down the processing time drastically. The observations of time taken by the various models of Raspberry Pi are brought out in the next section.
The Result Summary
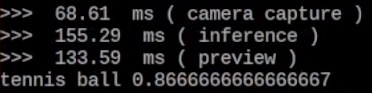
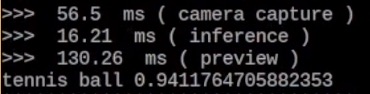
The results obtained from running the test scripts are summarised here. While running the scripts, the time taken by three tasks (camera capture, inference, preview) varies with every frame. Snap shot of average case is shown in the results.
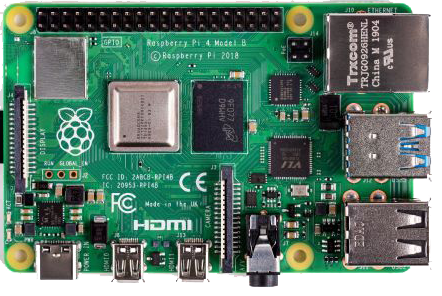
Raspberry Pi 4B (4GB)
|
CPU: 64 bit quad-core @ 1.5 GHz RAM: 4 GB |
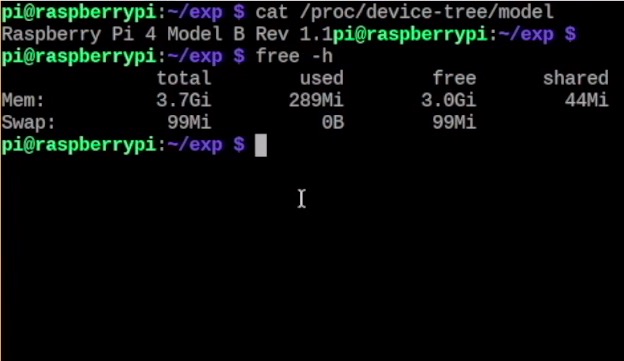
Commands verifying Raspberry Pi version |
Without Coral Accelerator (results of running ‘classify.py’)
With Coral Accelerator (results of running ‘classify_coral.py’)
Raspberry Pi 4B (8GB)
|
CPU: 64 bit quad-core @ 1.5 GHz RAM: 8 GB |
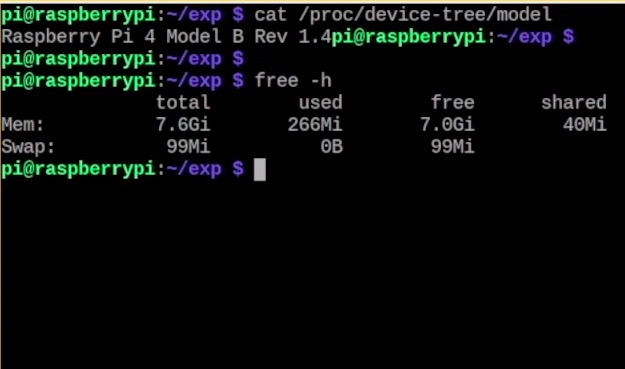
Commands verifying Raspberry Pi version |
Without Coral Accelerator (results of running ‘classify.py’)
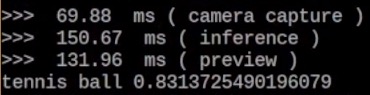
With Coral Accelerator (results of running ‘classify_coral.py’)
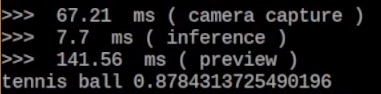
Raspberry Pi 3B
|
CPU: 64 bit quad-core @ 1.2GHz RAM: 1 GB |
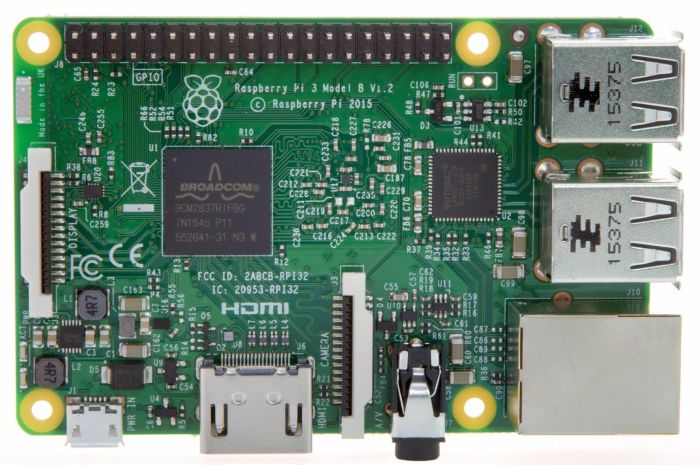
Commands verifying Raspberry Pi version |
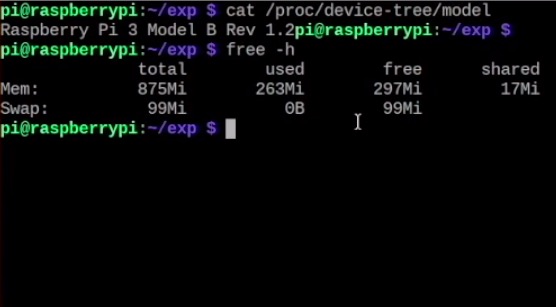
Without Coral Accelerator (results of running ‘classify.py’)
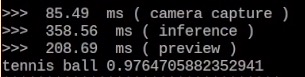
With Coral Accelerator (results of running ‘classify_coral.py’)
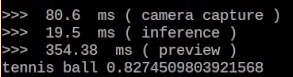
Raspberry Pi 3A+
|
CPU: 64 bit quad-core @ 1.4 GHz RAM: 512 MB |
Commands verifying Raspberry Pi version |
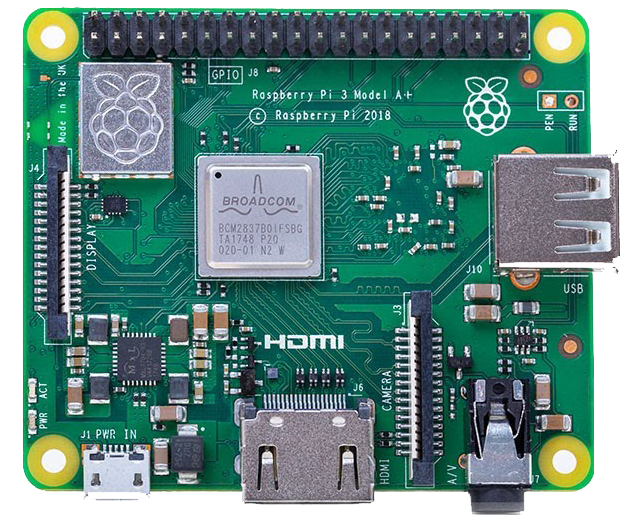
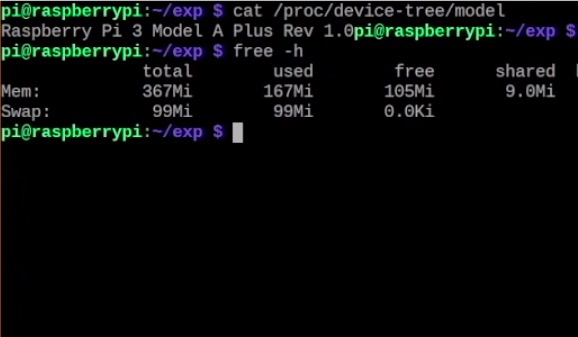
Without Coral Accelerator (results of running ‘classify.py’)
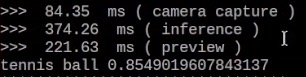
With Coral Accelerator (results of running ‘classify_coral.py’)
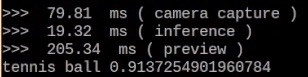
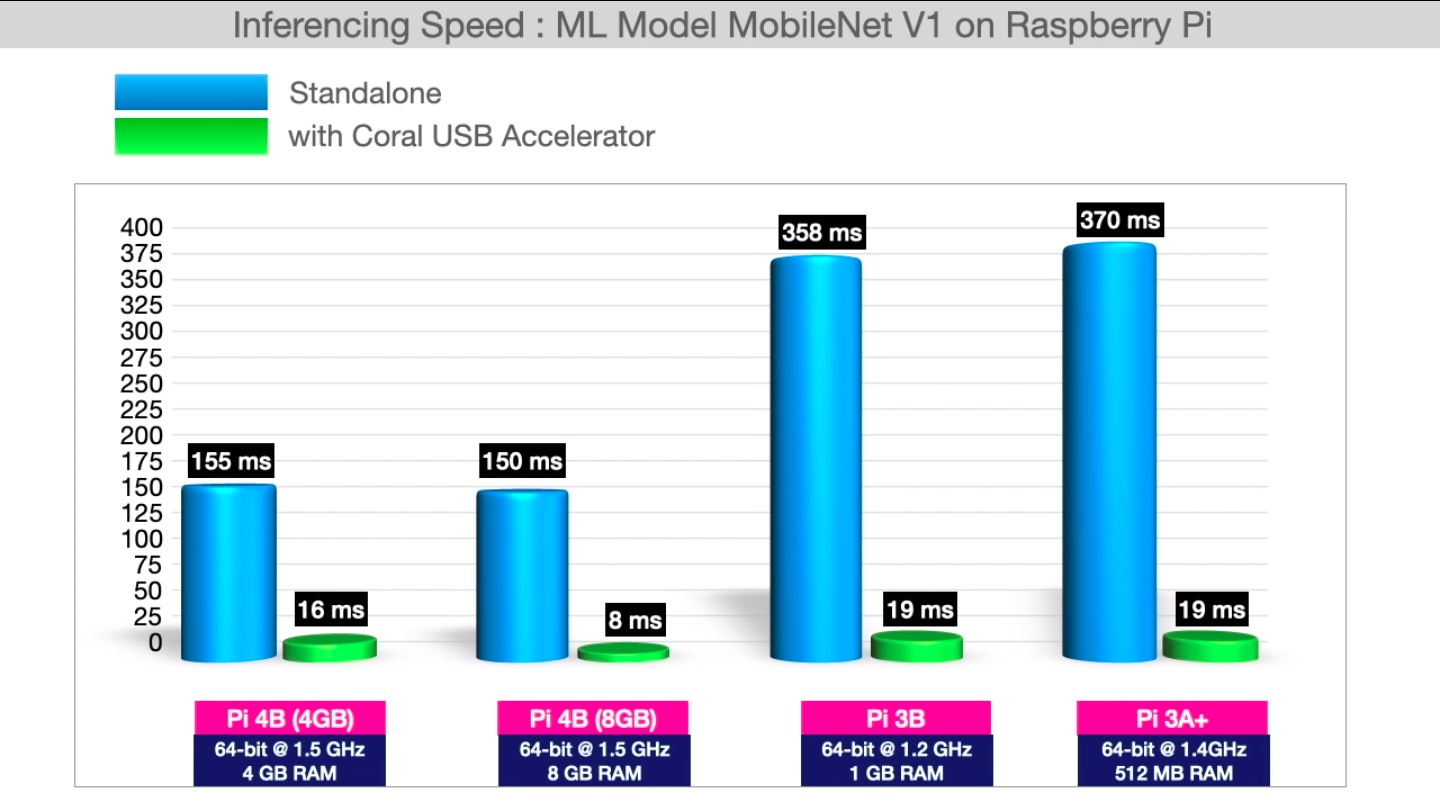
In all the above cases, we can see the drastic reduction in the inference time upon invoking Coral hardware. However, ‘camera capture’ and ‘preview’ still take the same amount of time because only the inferencing part is processed inside Coral hardware.
An overview of the results is provided by this graph.
The same test in 2026
The results above are from 2021. In September 2026 I measured this again on Raspberry Pi OS 13, with the setup described earlier, as part of the Model Garden project, which runs 24 models on one board, with and without the accelerator. For MobileNet V1, the model used in this article, the inference times were:
|
Board |
CPU inference |
Coral inference |
|
Raspberry Pi 4 |
94 ms |
4 ms |
|
Raspberry Pi 3A+ |
360 ms |
10 ms |
The distance between the two boards is wider than the processors alone explain. The Pi 3A+ has USB 2.0 only, and with the accelerator attached a good part of the time goes into moving tensors across that bus rather than computing. The same Coral on a USB 3.0 host is considerably faster, so this is a limit of the board, not of the accelerator.
You can repeat the measurement with the updated scripts: run classify.py and then classify_coral.py, and compare the inference line each prints.
Code Walkthrough
Since both the test scripts are identical, I will cover ‘classify_coral.py’. Notice the modifications which you need to incorporate in any script to make it compatible with Coral hardware. In the code they are marked with Coral change comments.
In the import section, load_delegate needs to be imported for Coral Hardware
# Coral change 1 of 3: load_delegate hands the model to the accelerator.
from ai_edge_litert.interpreter import Interpreter, load_delegate
Before we get into the forever loop of performing the three tasks shown in the flowchart above, we need to initialise the interpreter and load the model into it. We start with selecting the model file. Here we need to specify the model file that is compiled for edgetpu. The Coral hardware won’t work with the model file that is not compiled for edgetpu.
HERE = os.path.dirname(os.path.abspath(__file__))
# Coral change 2 of 3: a model compiled for the Edge TPU. The Coral cannot run
# an ordinary .tflite file.
model_path = os.path.join(HERE, "mobilenet_v1_1.0_224_quant_edgetpu.tflite")
label_path = os.path.join(HERE, "labels_mobilenet_quant_v1_224.txt")
Now we use this model file to instantiate the interpreter. Here the ‘experimental_delegates’ parameter indicates that we want to delegate the inferencing part to Coral hardware.
# Coral change 3 of 3: build the interpreter with the Edge TPU delegate.
interpreter = Interpreter(model_path=model_path,
                          experimental_delegates=[load_delegate('libedgetpu.so.1')])
In classify.py, without the Coral, the same line is simply interpreter = Interpreter(model_path=model_path).
All the modifications that are required for using Coral Hardware have been covered so far. The rest is common to both scripts: the labels are read, the tensors are allocated, and two settings decide what is reported: how many of the model’s top guesses to keep, and the confidence below which the guess is shown as ___.
top_k_results = 2
threshold = 0.5         # below this confidence the result is shown as ___

with open(label_path) as f:
    labels = [line.strip() for line in f]

interpreter.allocate_tensors()
input_details = interpreter.get_input_details()
output_details = interpreter.get_output_details()
Preview window is generated through Matplotlib. This window is updated with the current camera frame. It is created only when there is a desktop to show it on; without one, the scripts run the same way and print the timings alone.
plt = None
if os.environ.get("DISPLAY"):
    import matplotlib.pyplot as plt
    plt.rcParams['toolbar'] = 'None'        # just the picture, no zoom buttons
    plt.rcParams['figure.raise_window'] = False   # don't pull the window to the front every frame
    plt.ion()
    fig = plt.gcf()
    fig.canvas.manager.set_window_title('TensorFlow Lite')
    fig.suptitle('Image Classification')
    ax = plt.gca()
    ax.set_axis_off()
    preview = None
    caption = ax.text(0.5, 0.95, "", transform=ax.transAxes, ha="center", va="top",
                      fontsize=18, bbox=dict(facecolor="white", edgecolor="none"))
The camera is opened through camera.py, which finds a USB webcam or the Raspberry Pi camera module, and then the script loops continuously to perform the three tasks.
cam = camera.open_camera()
=> camera capture.
start = time.time()
frame = cam.read()
img = centre_crop(frame)
time_elapsed(start, "camera capture")
centre_crop() cuts the 224 x 224 pixels the model needs out of the middle of the 640 x 480 frame, and time_elapsed() prints how long the step took.
=> Inference
start = time.time()
interpreter.set_tensor(input_details[0]['index'], np.expand_dims(img, axis=0))
interpreter.invoke()
predictions = interpreter.get_tensor(output_details[0]['index'])[0]
top_k_indices = np.argsort(predictions)[::-1][:top_k_results]
pred_max = predictions[top_k_indices[0]] / 255.0
lbl_max = labels[top_k_indices[0]]
time_elapsed(start, "inference")
The frame gets a batch dimension and goes into the input tensor, the model runs, and of the 1,000 probabilities it returns, the highest is kept along with its label.
=> Preview
if plt:
    start = time.time()
    if pred_max >= threshold:
        caption.set_text(" %s (%.1f%%) " % (lbl_max, pred_max * 100))
    else:
        caption.set_text("___")
    if preview is None:
        preview = ax.imshow(frame)
        plt.tight_layout()
    else:
        preview.set_data(frame)
    plt.pause(0.001)
    time_elapsed(start, "preview")
    if not plt.fignum_exists(fig.number):
        break
The result is written onto the picture and the window is refreshed. Each pass ends by printing the best guess and its confidence, then waiting a second so the output can be read.
print(lbl_max, pred_max)
print("********************************")
time.sleep(1)       # time to read the terminal output
Conclusion
The Coral USB Accelerator does exactly one job, and does it very well: it runs the model. On a Raspberry Pi 4, MobileNet V1 goes from about 94 ms on the CPU to about 4 ms on the Coral, more than twenty times faster. On a Pi 3A+ it goes from about 360 ms to about 10 ms. Capturing the camera frame and drawing the preview take just as long as before, because the Coral does not touch them. For a real-time project, that decides where the next speed-up has to come from once the model is on the Coral.
Moving an existing TensorFlow Lite script onto the Coral takes three changes: import load_delegate, point to a model compiled for the Edge TPU, and build the interpreter with the delegate. In 2026 the one extra step is the setup: the community-built Coral library, matched to the ai-edge-litert runtime. The installer in this article’s repository takes care of it. From here, Model Garden runs two dozen models on the same Pi with and without the accelerator, and robotics-level-4 puts the Coral to work on a robot that detects, tracks and follows.
Thank you for the experiment. There is one more paramters that would have been very interesting to measure – the overall CPU load. Running Tensorflow on the CPU is incredibly expensive (object detection on a single camera uses about 73% CPU for a single HD camera at 5 FPS in a RPi 4B 4Gb). A Coral USB is bound to reduce that dramatically, which also includes the overall CPU temperature long term. It would be really interesting to see a part 2 where you evaluate that aspect as well. Thank you for the time you dedicated to this – it is really useful.
where can i get the colar usb accelerator in india
Hi Sudhanshu,
You can try various buy options given here.. https://coral.ai/products/accelerator/
I got it through someone in US