The online remote created for this project allows you to control the GPIO pins and Camera of your Raspberry Pi boards over the internet using a web interface that you can personalise for your requirement.

The software of this project has two components. One that runs on cloud i.e. the Web Interface and other that runs on your Raspberry Pi. Both these components interact with each other to provide an out of the box service for your Raspberry Pi. The good part is, you need not write / modify any code. Also, no network configuration is required to be undertaken on your home router / network. Just make sure that the Raspberry Pi is connected to internet through your wifi LAN or any other hotspot.
It requires just a few minutes to setup and configure your online remote and Raspberry Pi. Once configured, you can start controlling the GPIO pins and view camera (attached to Raspberry Pi) images on your personalised web interface from anywhere in the world. The setting up process is described below.
Set up your online Remote
1. First of all you need to create an account to generate and receive your Authentication Token via email. If you already have an account, simply login and access your online remote.
2. Configure your remote using the settings icon. The numbers in the text boxes of configuration page correspond to GPIO pins of Raspberry Pi. Once configured, a button is assigned to control a specific pin as shown in the example below.
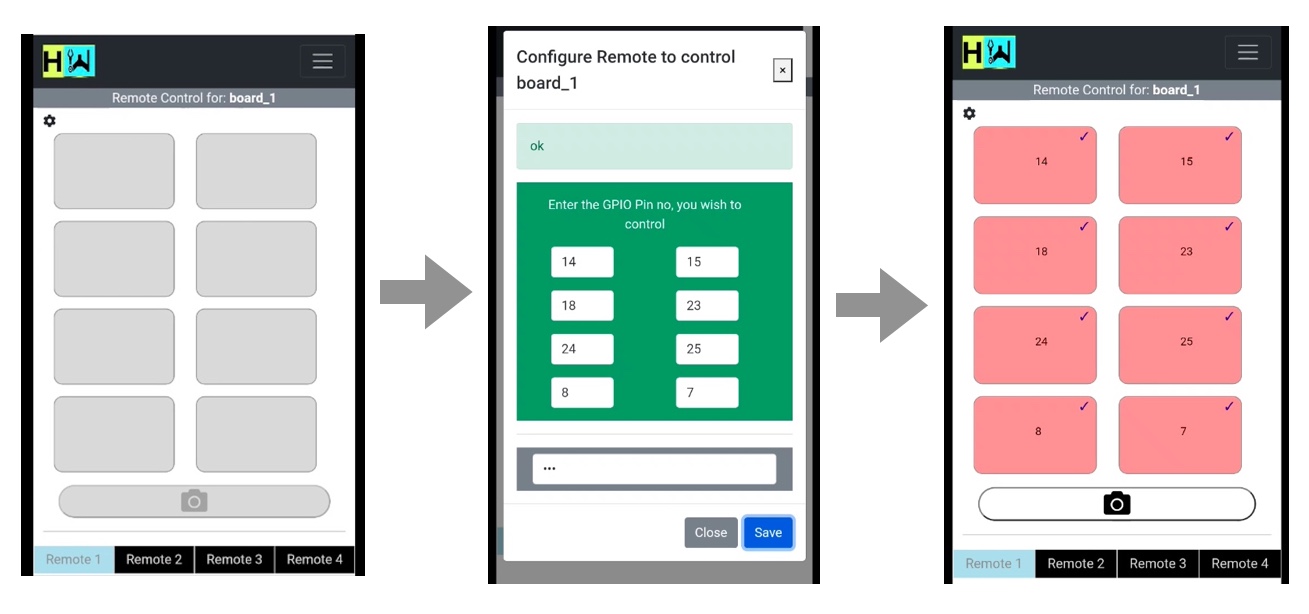
Standard 40 pin GPIO header of Raspberry Pi has 27 pins available for IO operations. You can enter any number between 1 – 27 in the boxes while configuration.
Similarly, you can configure upto 4 remotes using the web interface. These 04 remotes can control their individual Raspberry Pis as described later in this article.
Set up your Raspberry Pi
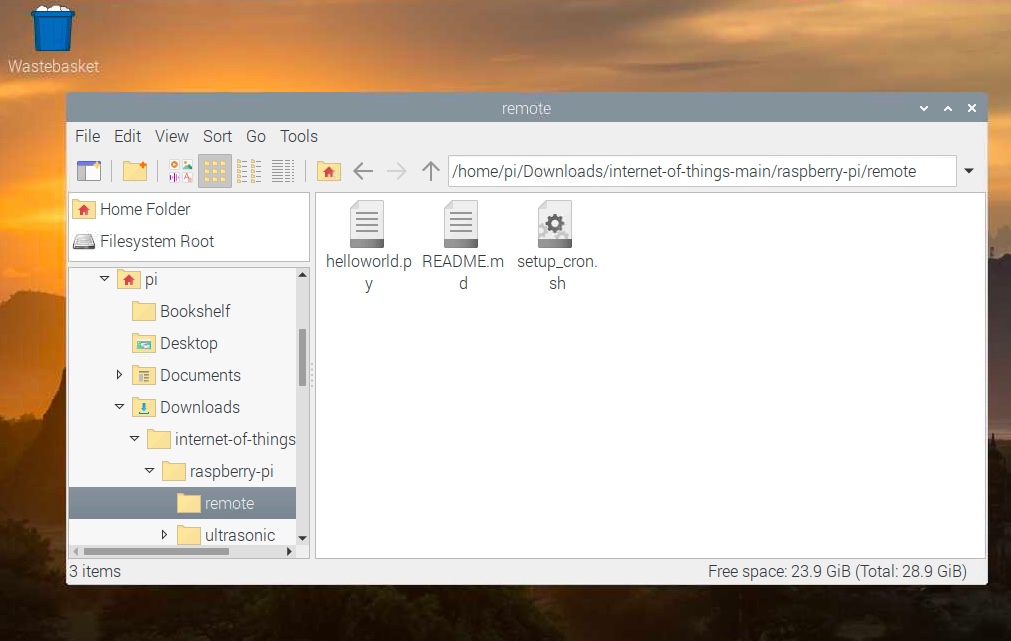
1. Download the code for Raspberry Pi from this Github link. The folder ‘remote’ inside folder ‘raspberry-pi’ contains the code for this project as shown in the picture below.
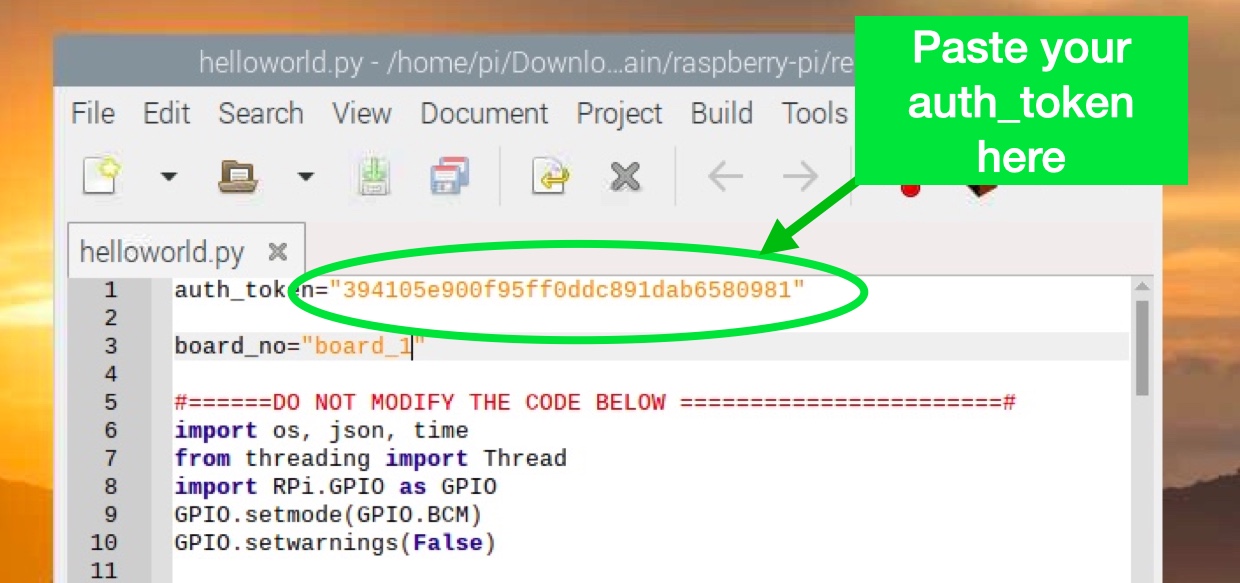
2. Paste your Authentication Token in the first line of ‘helloworld.py’ as shown below. The code in this file communicates with your online remote and fetches data to control the GPIO and Camera. You just need to paste your auth_token here and need not touch any other part of code.
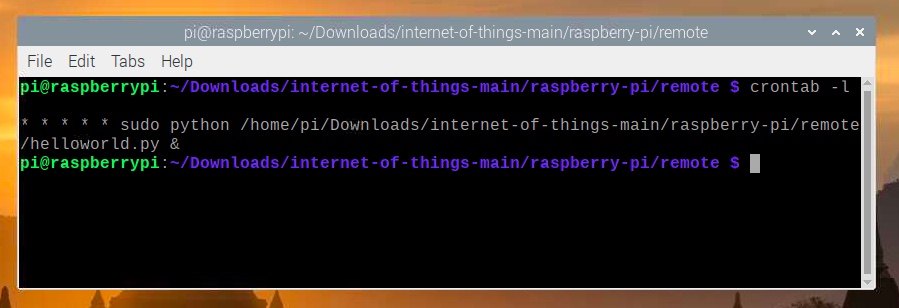
3. Create a cron task to run the file ‘helloworld.py’ at regular interval to fetch data from server. The bash script ‘setup_cron.sh’ helps you to create the cron task correctly. Just run the command as shown in the picture below and your setup is complete.
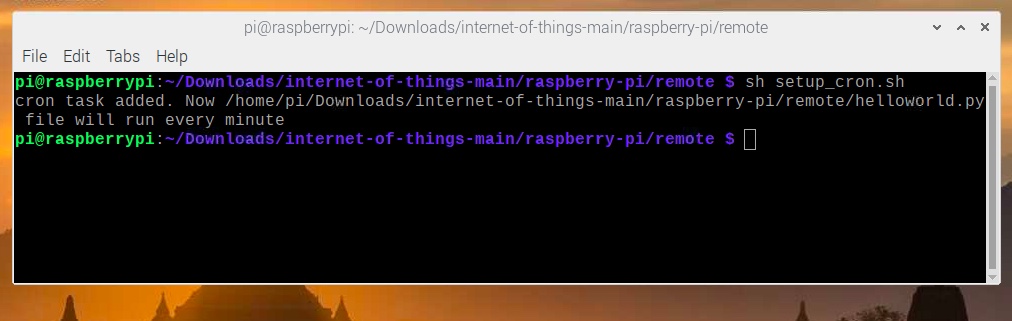
You can check the entry in cron table by running the command ‘crontab -l’. If you want to stop the automatic execution of the python file, then simply delete the cron task entry by editing the cron table using ‘crontab -e’ command.
You are all set to have fun with your online Remote and Raspberry Pi.
States of a button
The various states of a button during the command generation and execution are shown below. Single ‘tick’ on the button indicates that the command is in transit and waiting at the server. Double ‘tick’ is a feedback to you which indicates that the command has been received by your Raspberry Pi and actions is performed.
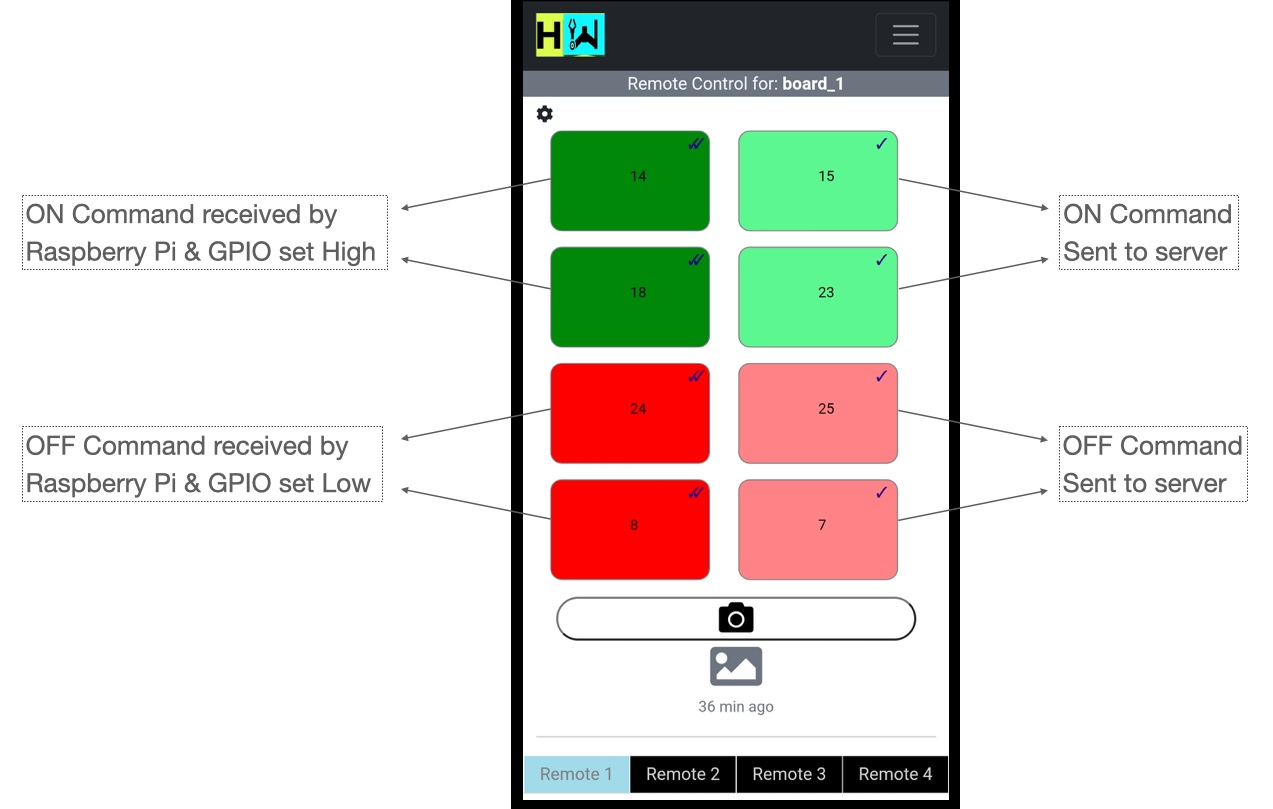
Time involved between command generation and its execution on remote Raspberry Pi may take upto 25 seconds. The state of the button (as described above) notifies whether the action is completed or pending.
Control multiple boards
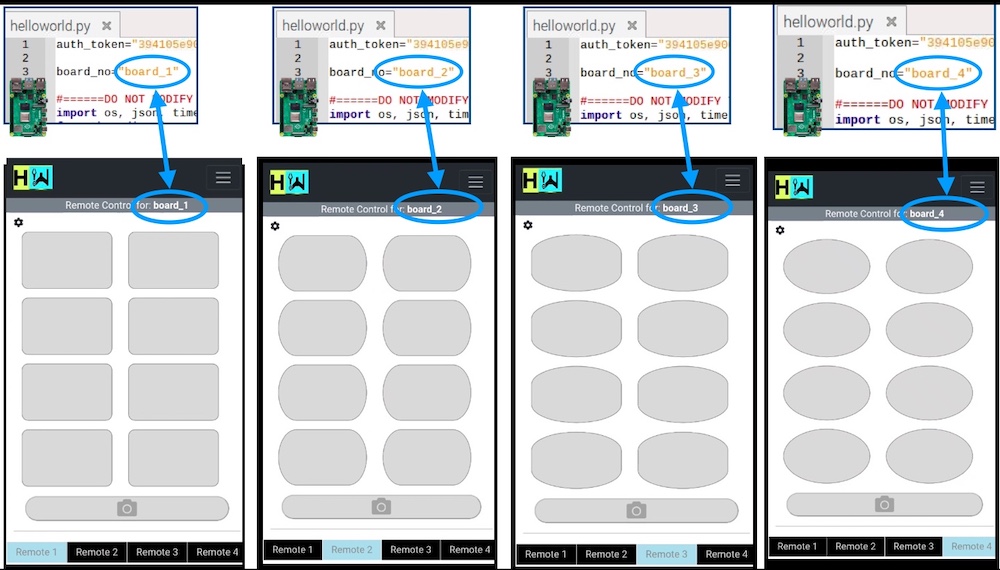
The web interface allows you to configure upto four remotes. That means, you can use these remotes to control 4 different / isolated boards (raspberry pis). The procedure to install code on each Raspberry Pi remains the same as described above. You just need to ensure that the value of ‘board_no’ on the second line of ‘helloworld.py’ needs to correspond to the Remote no selected on the web interface.
thanks
Hello,
After registeration, I have not received authentication code on the registered email ID.
Please advice.
Have you ever considered creating an ebook or guest authoring on other websites? I have a blog based upon on the same ideas you discuss and would love to have you share some stories/information. I know my viewers would appreciate your work. If you are even remotely interested, feel free to send me an e mail.
What is your blog about
Hi,
I’m trying to create an application just like what you did.
If I may ask if you can help me through on what platform to create the application for my brother’s project?
Thank you
Is the service chargable?
You just need to buy any Raspberry Pi. No cost for the online remote.
Thanks for that. It’s incredibly generous. Who funds this great service and will it remain free for personal use?
Yes it’s free for personal use. Will extend it for ESP32 microcontrollers shortly